|
How I Built Fred Part 4
|
|
How I Built Fred Part 4
|
|
The additional notches in the lower ring are guide slots so that the shoulders would eventually align properly along pins attached to the top of the inside of the skirt.
|
|
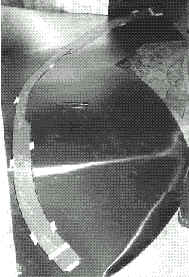
| I used a clear piece of plastic to attach to the shoulder frame to cut out an approximate pattern for the sheet aluminum. I trimmed off the excess where necessary, to get the right shape. Then I nailed the metal to the frame. Getting the right curve was tricky. | |
| The Gun and Arm Boxes | |
|
Next came having to build some sort of ball and socket assembly for the gun and arm. Admittedly, I was kinda making this up as I went along. |
|
|
Using 3/4" plywood again, I measured the angles of the arm boxes and scaled up from the tech drawings. |
|
| Using the angles in the tech manual drawings, I tried the best I could to mitre the cuts using a radial arm saw. | |
|
View of gun boxes from above |
Gun boxes with shoulders before cutting and attaching |
 |
The next trick was just fitting the boxes at the right angle so there'd be a good match between the surfaces coming in contact with each other. Basically, I eyeballed it and kept cutting and sanding until the matched fairly well. |  |
|
|
|
||
|
Gun boxes with holes drilled and holes cut. |
|||
|
View from inside |
|||
| I
carefully attached them with wood screws from the inside. Once I had a
good fit, I disassembled them again and cut out the holes. Back in
1984, there weren't any reasonably affordable hole saws for the size I
needed to use only a couple of times. So I used a smaller one I had on
hand and then used a saber saw (my dad didn't have a jigsaw, which
might've made things easier) set at an angle. From there, I filed and
sanded until I got about the right smooth angle inside for a
hemisphere to seat against.
I'll come back to the ball and socket assembly in a little bit. |
|||
|
The Waistband |
|
| To hide the join between the shoulders and the "skirt" of a Dalek, the designers created a "waistband" to go around the bottom of the shoulders. | |
|
|
Even with the
sheet plastic pattern, I had a devil of a time getting the waistband
around the bottom of the shoulders to look right and fit properly in
one piece. It was then, after I studied the pictures, that I
realized there was a reason why there was a small band of metal
centered at the front and the back, each encircling the waistband
vertically: The waistband was was actually in two pieces, and those
two bands hid the spots where the ends met.
I also observed from photos that there were small spacer blocks that made the waistband stand away from the shoulders and allow the bottom edge drop below the level of where the shoulders and the top of the skirt met. |
|
The pattern laid out on the metal |
|
| So, first, I had to nail on the spacers. Then, with lots of "slop factor", I used a plastic pattern to cut out the two halves of the waistband, trimming off the excess once I attached it to the shoulder unit. Once I had the right fit, I cut the pieces out and nailed them into the spacer blocks, taking into account the clearance for the gun boxes. |  |
|
The waistband half assembled |
|
|
|
At the time, I had no
real experience with electronics and the problems associated with types of
microphones and the problems with speaker feedback. I know some Dalek
builders got around that and had their speakers mounted in their necks.
Since some Daleks had speaker grill, I just thought my Dalek Supreme
hybrid would too. By having the speaker down below where my mouth would
be, relatively speaking (and enclosing the speaker), I avoided the reverb
problem.
I used another piece of sheet plastic to cut out the hole in the shoulders. |
|
With one half of |
 |
| Back | Next |