| I'm
going to try and explain how I construct my wire armature heads.
They're very lightweight, fairly comfortable and provide for a certain
amount of space around your face. If you're even mildly
claustrophobic you can see the advantage to this as opposed to traditional
mascot-type heads. It's like wearing a helmet as opposed to a
full-hood; the wire holds the foam away from your face. |
|
|
Basic Construction Materials: |
Tools: |
|
|
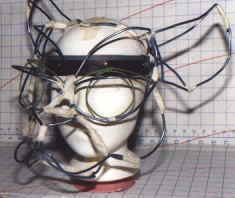
| The basic contact point is the headband; the bridge of the nose and maybe a couple points at the back of the skull provide stability for a closer fit. The headband used here is from an Optivisor©. It is used to support the lenses of this type of magnifier. The headbands are available separately as replacement parts; check with your local art supply store. Another option is the headband from a welder's mask although I think these might be more expensive. The advantage to these bands is that they are adjustable (at the back) and can be padded for comfort; they also grip the head so that the finished head will turn with your head, giving it a more realistic action. | |
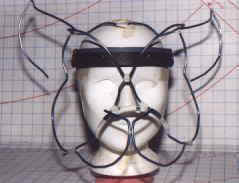 These pictures show the first stages.... |
 ....cheeks nose, upper brow ridge, nose and the edge of the ears. |
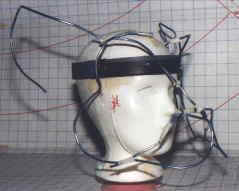
| The secret behind wire armature construction is thinking in 3-D. A basic knowledge of skeletal and muscular sub-structure is good; after all that's what you're creating with the wires -- a skeleton. Continuing that line of thought; the foam sheeting is the muscle layers. The armature wire is cut into manageable lengths and bent into shape, it can usually be formed by hand but you may need pliers for sharp bends and tight curves. A long piece of the thinner wire is used to bind the armature wire where two pieces meet, wrapping repeatedly around the area to stabilize the join. Thin wire is also used to bind the larger wire to the headband, again wrapping repeatedly. I always put masking tape ove the wrapped areas of thin wire to keep it from slipping and contain the ends, you don't want those tiny wires escaping to poke you -- they can be very sharp. | |
 |
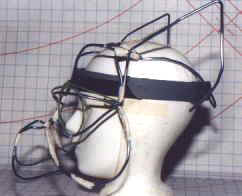 |
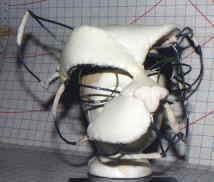
| Gradually you add more wires including support wires across the top and back of the head. Above you can see a lot of the eye socket construction. Getting a good look to the eyes is very important if you want the critter to look remotely realistic. Include a brow ridge, upper and lower eye lid / edge, lid crease, and a support for the surface of the eye -- in this case a circle of florist wire to support a resin iris. | |
 |
 |
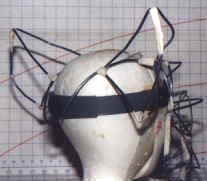
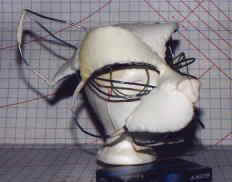
| Here you can see where the back ridge of the ear has been added and anchored to the back and side supports of the head. | Here the armature is virtually complete. It's a little hard to see what's going on at this point because of all the wires. It becomes clearer as the foam is attached. |
 |
 |
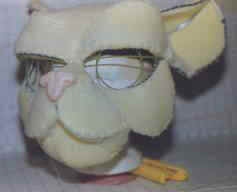
| The nose
(of Sculpey) has been attached and the process of sewing the foam sheeting
to the armature has begun.
Adding the foam is always neat; you can really see the planes of the face develop which you had only envisioned before. The foam is sewn to the armature by using a whipstitch around the edge of the foam and the wires. Remember: Think of the foam as muscle and apply the lowest layers first; more prominent features are last. |
|
 |
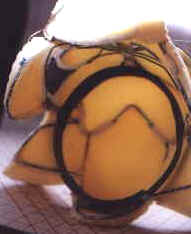 |
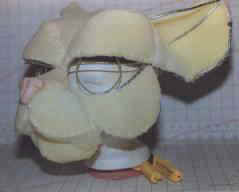
| You can see where the foam is stitched around the wires and can clearly see the sections of foam in the backlit photo on the right. | |
 |
 |
| The foam work is complete. At this point it looks very much like a cat without fur. Next you'll add fur, eyes and accessories. | |
| On the next page I'll show you the finished head and tell you about some of the details ; the interior, the eyes and ears. | |